Table of Contents
The first time I encountered chocolate flan cake was at my grandmother’s 70th birthday celebration. As the dessert made its grand entrance, conversations hushed and all eyes locked onto the mesmerizing two-toned creation. One bite of that velvety flan floating atop rich chocolate cake had me wondering how I’d lived so long without experiencing this culinary marvel. The magical blend of silky custard and moist chocolate cake, all drenched in amber caramel, created a symphony of textures and flavors I couldn’t stop thinking about for weeks.
- Bist Amazon Picks:
That’s the spell that chocolate flan cake—also known as “chocoflan” or “impossible cake”—casts on anyone fortunate enough to taste it. By the end of this article, you’ll have everything you need to create this show-stopping dessert that combines the best of chocolate cake and creamy caramel flan, impressing family and friends with your culinary prowess.
What is Chocolate Flan Cake? The Magical Dessert Explained
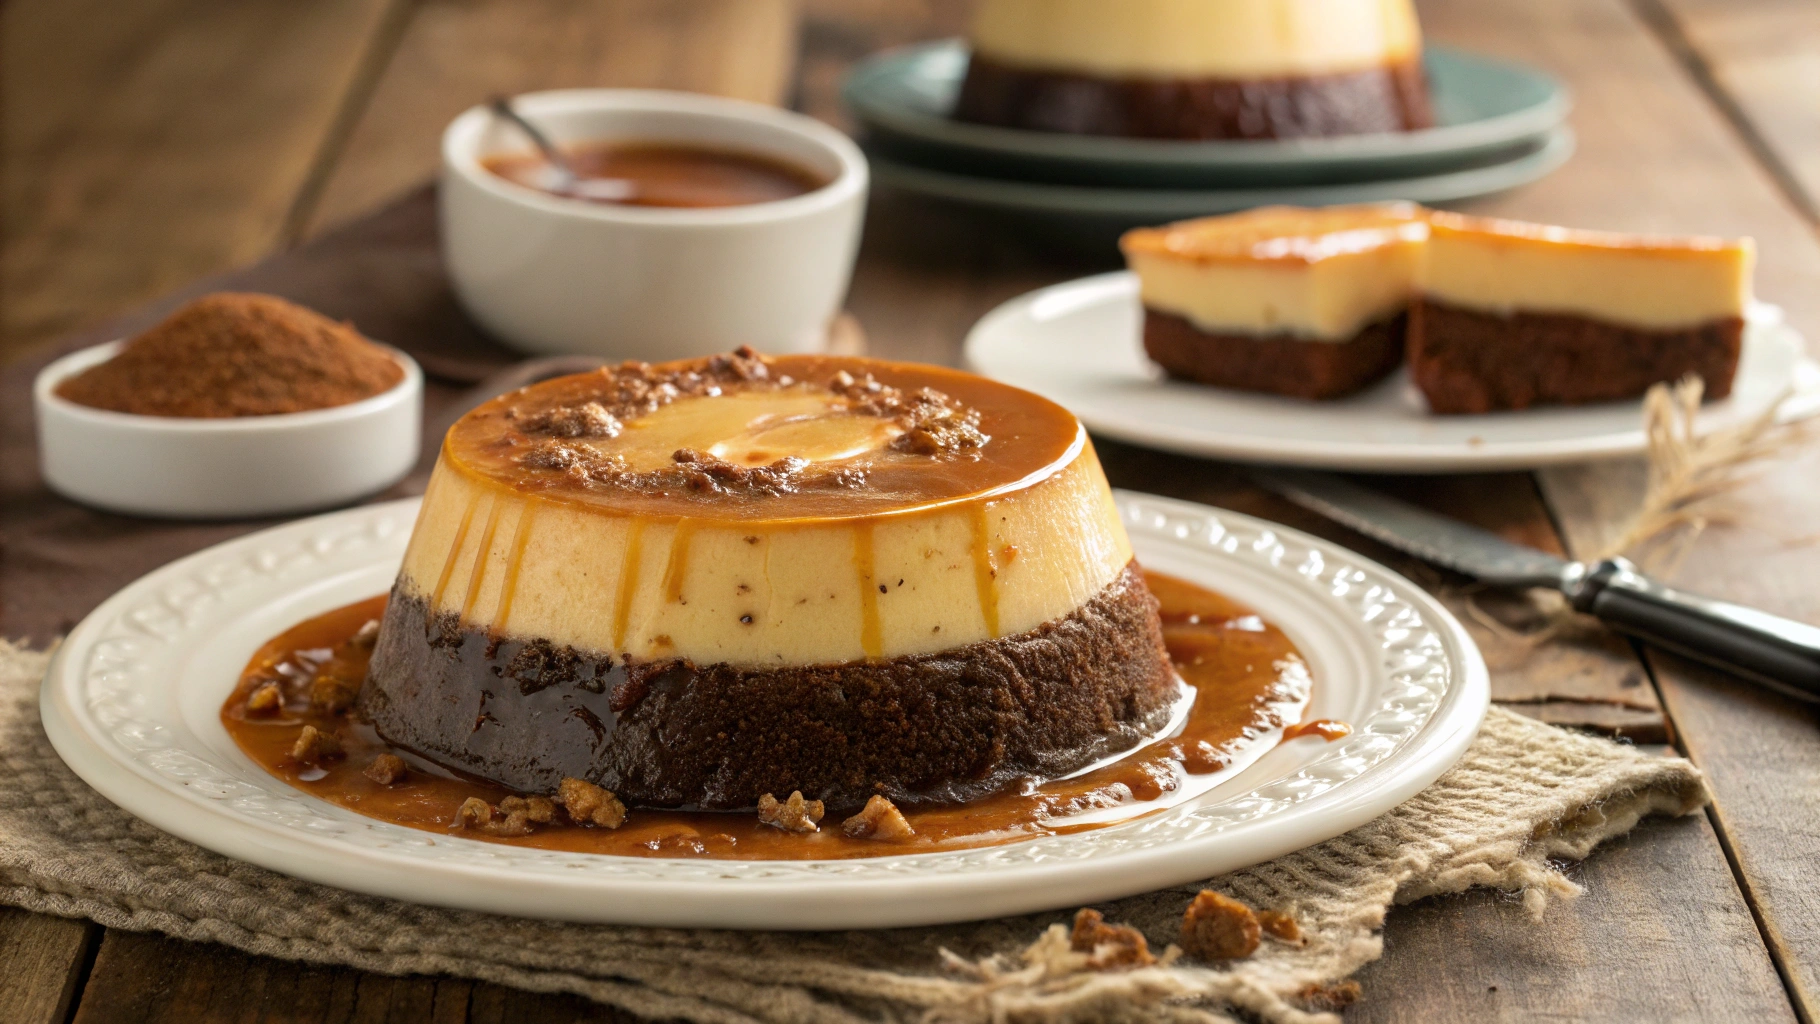
Chocolate flan cake represents the beautiful marriage of two beloved desserts: rich chocolate cake and silky caramel flan. This Mexican culinary treasure (called “pastel imposible” in Spanish) earned its “impossible cake” nickname because of what happens during baking. The cake batter and flan mixture are poured into the same pan, but through the magic of density and physics, they swap places as they bake. What goes in first comes out last, creating a dessert that seems to defy gravity.
Dating back generations in Mexican households, chocoflan traditionally appears at celebrations, family gatherings, and holidays. The dessert’s dual-layer nature symbolizes abundance and the blending of cultures that characterizes Mexican cuisine. While recipes vary across regions, the fundamental principle remains: chocolate cake base, creamy flan top, all bathed in caramel.
What makes a perfect chocolate flan cake? The chocolate layer should remain moist and tender, not soggy from the flan. The custard layer must achieve that quintessential flan consistency—firm enough to hold shape when sliced yet trembling with creaminess. And the caramel must strike the right balance, offering notes of sweetness with subtle bitter complexity that cuts through the richness of the other components.
Why This Chocolate Flan Cake Recipe Stands Above the Rest
After testing countless variations, this particular chocolate flan cake recipe delivers remarkable results every time. What sets it apart? Perfect balance. Many recipes create either an outstanding cake with mediocre flan, or vice versa. This recipe ensures both components shine equally, with the chocolate cake remaining decadently moist while the flan maintains its characteristic silkiness.
Common mistakes in other recipes include overly sweet cake layers that compete with the caramel, or flan mixtures that seep too deeply into the cake. This recipe carefully calibrates each element’s sweetness and incorporates cream cheese into the flan for added stability and tang, complementing the chocolate perfectly.
Maria Rodriguez, pastry chef at Dulce Vida Bakery, notes, “I’ve adapted many chocoflan recipes over twenty years, but this version strikes the ideal balance between authenticity and reliability. Home bakers consistently achieve restaurant-quality results.”
Essential Ingredients for the Perfect Chocolate Flan Cake
For the Caramel Layer
| Ingredient | Amount | Notes |
|---|---|---|
| Granulated sugar | 1 cup | Use pure cane sugar for clean flavor |
| Water | 1/4 cup | Filtered water prevents crystallization |
For the Chocolate Cake Layer
")
| Ingredient | Amount | Notes |
|---|---|---|
| All-purpose flour | 1 1/2 cups | Sifted for best texture |
| Unsweetened cocoa powder | 1/3 cup | Dutch-processed for richer flavor |
| Baking soda | 1 tsp | For proper leavening |
| Salt | 1/4 tsp | Enhances chocolate flavor |
| Butter | 1/2 cup | Unsalted, room temperature |
| Sugar | 1 cup | Granulated |
| Eggs | 2 large | Room temperature |
| Vanilla extract | 1 tsp | Pure, not imitation |
| Buttermilk | 1 cup | Adds moisture and tenderness |
For the Flan Layer
| Ingredient | Amount | Notes |
|---|---|---|
| Condensed milk | 1 can (14 oz) | Creates rich texture |
| Evaporated milk | 1 can (12 oz) | For authentic flan flavor |
| Cream cheese | 4 oz | Room temperature, for silkiness |
| Eggs | 4 large | Room temperature |
| Vanilla extract | 1 tsp | Pure, not imitation |
Equipment You’ll Need
Creating chocolate flan cake requires some specialized equipment for optimal results:
- 12-cup Bundt pan (preferably non-stick with intricate design for visual appeal)
- Stand mixer or hand mixer for incorporating air into the cake batter
- Large roasting pan for water bath
- Fine mesh strainer for perfectly smooth flan
- Instant-read thermometer for checking doneness
- Offset spatula for loosening edges after baking
Don’t have a Bundt pan? A 10-inch tube pan with removable bottom works wonderfully. For the water bath, any large baking dish that allows the Bundt pan to sit comfortably with space for water around it will suffice.
Step-by-Step Instructions for Chocolate Flan Cake
Preparing Your Kitchen
- Preheat your oven to 350°F (175°C), positioning the rack in the middle.
- Find a roasting pan large enough to hold your Bundt pan with at least 1 inch clearance all around.
- Bring a kettle or large pot of water to boil for the water bath.
- Ensure all refrigerated ingredients have reached room temperature.
Making the Caramel Layer
- Combine sugar and water in a heavy-bottomed saucepan over medium heat, stirring until sugar dissolves.
- Once dissolved, stop stirring and allow mixture to boil, occasionally swirling the pan gently, until it transforms into an amber color (about 8-10 minutes).
- Immediately pour caramel into your Bundt pan, carefully tilting to coat the bottom evenly.
- Set aside to cool and harden while preparing remaining components.
Creating the Chocolate Cake Layer
- Whisk together flour, cocoa powder, baking soda, and salt in a medium bowl.
- In your stand mixer, cream butter and sugar until light and fluffy (about 3-4 minutes).
- Add eggs one at a time, beating well after each addition, then incorporate vanilla extract.
- Gradually add dry ingredients in three batches, alternating with buttermilk, beginning and ending with dry ingredients. Mix just until combined.
- Gently pour or spoon batter over the hardened caramel layer in the Bundt pan.
Preparing the Flan Layer
- Clean your mixer bowl and place cream cheese in it, beating until completely smooth.
- Add condensed milk and blend until incorporated.
- Mix in evaporated milk, eggs, and vanilla until homogeneous.
- Pour mixture through a fine-mesh strainer directly over the cake batter in the Bundt pan. The flan mixture will seem to sink beneath the cake batter—this is exactly what should happen!
Baking the Chocolate Flan Cake
- Cover the Bundt pan tightly with aluminum foil.
- Place the covered pan into your roasting pan, then carefully pour hot water into the roasting pan until it reaches halfway up the sides of the Bundt pan.
- Carefully transfer to the oven and bake for 60-75 minutes. The cake is done when an instant-read thermometer inserted into the center registers 180°F (82°C).
- Remove from water bath and allow to cool on a wire rack for 30 minutes.
- Refrigerate for at least 4 hours, preferably overnight.
- To unmold, run a thin knife around the edges, place a serving plate over the pan, and flip in one swift motion.
Troubleshooting: Common Chocolate Flan Cake Problems and Solutions
Even experienced bakers occasionally encounter challenges with this magical dessert. Here’s how to overcome common issues:
Issue: Flan and cake layers didn’t switch places
- Solution: Ensure your cake batter isn’t too thick—it should be pourable but not runny. The density difference between the cake and flan mixtures creates the magic, so proper consistency matters tremendously.
Issue: Caramel hardened too much before adding batters
- Solution: Work quickly after pouring caramel. If it hardens too much, place the Bundt pan in a warm oven (about 200°F/93°C) for five minutes to soften slightly before adding cake batter.
Issue: Cake is too dry
- Solution: Monitor internal temperature rather than relying solely on time. Remove the cake when it reaches 180°F internally, even if that’s earlier than the recipe suggests. Every oven behaves differently.
Issue: Flan texture isn’t smooth
- Solution: Always strain the flan mixture and ensure ingredients are at room temperature before blending. Cold ingredients can create lumps that affect the final texture.
Serving Suggestions for Your Chocolate Flan Cake
Chocolate flan cake reaches peak deliciousness when served slightly chilled—remove it from refrigeration about 30 minutes before serving to take the edge off the cold while maintaining structural integrity.
For everyday enjoyment, serve slices plain to appreciate the interplay of flavors. For special occasions, elevate your presentation with:
- Fresh raspberry or strawberry garnish for color contrast and complementary flavor
- Light dusting of cocoa powder over the flan layer
- Thin drizzle of additional caramel sauce
- Dollop of lightly sweetened whipped cream alongside
This dessert pairs beautifully with coffee, particularly medium-roast varieties that highlight the chocolate notes without overwhelming the custard. For adult gatherings, consider serving with Pedro Ximénez sherry or ruby port, whose sweet profiles complement the caramel elements.
Variations on the Classic Chocolate Flan Cake
Mexican Chocolate Flan Cake
Transform your dessert with traditional Mexican chocolate flavors by adding 1 1/2 teaspoons ground cinnamon and 1/4 teaspoon cayenne pepper to the cake batter. The subtle warmth builds complexity without overwhelming the palate. For authentic preparation, replace standard cocoa with Mexican chocolate discs (melted with the butter), adjusting sugar accordingly as these often contain sugar and spices already.
Coffee-Infused Chocolate Flan Cake
Coffee naturally enhances chocolate flavors. Dissolve 2 tablespoons espresso powder in the buttermilk before incorporating it into the cake batter. For the flan layer, infuse the evaporated milk with a split vanilla bean and 1 tablespoon coffee beans (strain before using). The result offers sophisticated depth perfect for dinner parties.
Gluten-Free Chocolate Flan Cake
Good news for those avoiding gluten: the flan portion is naturally gluten-free. For the cake layer, substitute all-purpose flour with a high-quality gluten-free baking blend containing xanthan gum. Add 1/4 teaspoon additional baking powder to ensure proper rise, as gluten-free flours often need extra leavening assistance.
Make-Ahead and Storage Tips for Chocolate Flan Cake
One of chocolate flan cake’s virtues is how well it keeps. In fact, many bakers insist it tastes better on day two, after flavors have melded overnight. The cake keeps beautifully refrigerated for up to five days, making it ideal for preparation well before special occasions.
Store in the refrigerator covered loosely with plastic wrap rather than in an airtight container, which can cause condensation to form on the flan’s surface. If you need to freeze portions, individual slices freeze relatively well for up to one month when wrapped carefully in plastic wrap and then aluminum foil. Thaw overnight in the refrigerator for best texture preservation.
For transporting to gatherings, keep the cake in the Bundt pan until arrival, then unmold on site for maximum visual impact and structural integrity.
The History and Cultural Significance of Chocolate Flan Cake
Chocoflan exemplifies Mexico’s rich culinary tradition of blending indigenous ingredients with European techniques. While flan arrived with Spanish colonizers, its marriage with chocolate—an ingredient sacred to ancient Mesoamerican civilizations—created something entirely unique to Mexican cuisine.
Traditionally prepared for celebrations like birthdays, weddings, and holidays, this dessert represents abundance through its multiple components. Its popularity spread northward into Tex-Mex cuisine and has now gained international recognition as professional chefs discover its appealing contrast of textures.
In many Mexican families, the recipe passes through generations, with each adding subtle variations. Some historians believe the dessert gained prominence in the mid-20th century as home ovens became more common, allowing precise temperature control necessary for proper layer separation.
Conclusion
Chocolate flan cake stands as testament to culinary ingenuity—a dessert that initially seems paradoxical yet works beautifully. The magic happens not just in the way the layers swap places, but in how the components complement each other: the bitter notes in the caramel cutting through sweetness, the richness of chocolate finding perfect counterpoint in creamy flan.
Having mastered this recipe, you’ve gained more than just another dessert for your repertoire. You’ve connected with a rich cultural tradition and acquired a signature dish guaranteed to create moments of shared delight around your table. As your guests marvel at both the cake’s appearance and flavor, you’ll understand why this “impossible” dessert continues captivating dessert lovers worldwide.
Ready to create your own chocolate flan cake magic? Gather your ingredients, embrace the process, and prepare for the wonderful moment of unveiling when you flip your creation onto a serving plate. We’d love to hear about your chocoflan adventures—share your results, variations, and the reactions they inspire by leaving a comment below!
Frequently Asked Questions About Chocolate Flan Cake
Can I make Chocolate Flan Cake without a bundt pan?
Yes! While a Bundt pan creates the traditional shape, you can use a 9-inch springform pan wrapped tightly in foil to prevent water seepage. The visual effect differs slightly, but the flavor remains outstanding. Some bakers even use individual ramekins for personal-sized chocolate flan cakes, reducing baking time to about 40 minutes.
Why did my chocolate flan cake layers not separate properly?
Layer separation relies on proper density differences. Ensure your cake batter isn’t overmixed, which can develop too much gluten and create a batter too dense to allow the flan to sink. Also check that your oven temperature is accurate—too hot, and the cake sets before layers can switch positions.
How far in advance can I make chocolate flan cake?
Chocolate flan cake actually improves with time! Make it up to three days before serving, keeping it refrigerated. The flavors meld beautifully overnight, and the texture stabilizes, making slicing cleaner. This make-ahead quality makes it perfect for entertaining.
What makes a chocolate flan cake different from a regular flan?
Unlike traditional flan that features just custard and caramel, chocolate flan cake combines a complete chocolate cake layer with the flan, creating multiple textures and flavors in each bite. The baking method allows these distinct components to remain separate while complementing each other perfectly.
Can I substitute ingredients in chocolate flan cake for dietary restrictions?
While traditional chocolate flan cake contains dairy and eggs that are fundamental to its structure, you can make adjustments. For lactose sensitivity, lactose-free evaporated and condensed milk products work wonderfully. Unfortunately, vegan substitutions significantly alter the chemistry that creates the separate layers, resulting in a different (though still delicious) dessert.
Is chocolate flan cake difficult for beginners to make?
While it looks impressive, chocolate flan cake is remarkably forgiving for beginners. The most challenging aspects are caramel-making and water bath setup. Take your time with the caramel, watching color rather than timing, and ensure your water bath doesn’t splash into the cake pan. Focus on these two elements, and even novice bakers can achieve spectacular results.
What’s the secret to a perfect caramel layer in chocolate flan cake?
The perfect caramel reaches amber color without burning—watch carefully as it can darken rapidly. Once it reaches proper color, immediately remove from heat and pour into your pan. Never stir once the sugar dissolves; swirl the pan gently instead to prevent crystallization. For deeper flavor, add a pinch of salt to the finished caramel.
