Table of Contents
Have you ever pulled a tray of chicken cutlets from the oven only to find them disappointingly soggy instead of satisfyingly crisp? That familiar sinking feeling—wanting the crunch without the calories and mess of frying—is something many home cooks experience. For years, achieving that restaurant-quality golden crispiness without submerging chicken in bubbling oil seemed nearly impossible in my kitchen.
The turning point came during a particularly frustrating Sunday dinner preparation. After yet another lackluster batch emerged from my oven, I embarked on a mission to uncover the secrets that separate mediocre baked cutlets from spectacular ones. Through countless trials, conversations with professional chefs, and deep dives into culinary science, I discovered the techniques that transformed my chicken cutlet game forever.
- Bist Amazon Picks:
Whether you’re a harried parent seeking healthier weeknight options or someone aiming to elevate your cooking fundamentals, these methods will revolutionize your approach to baked chicken cutlets. The techniques shared here will help you consistently achieve that coveted crunch factor while keeping preparation straightforward and results delicious.
Why This Article Will Help You Master Baked Chicken Cutlets
Before diving into specific recipes, understanding why certain techniques work makes all the difference in your culinary results. This comprehensive guide offers:
- Scientific explanations behind achieving crispy chicken without frying
- Professional techniques broken down into manageable steps
- Diverse recipes catering to various flavor preferences and dietary requirements
- Solutions for common problems that plague baked cutlet attempts
By the time you finish reading, you’ll possess the knowledge to create golden, crunchy chicken cutlets that might have everyone questioning whether they’re actually baked.
The Science of Crispy Baked Chicken Cutlets
What Makes Baked Chicken Cutlets Crispy?
Creating that satisfying crunch factor involves understanding several critical elements working in harmony:
- Moisture management: Excess moisture is crispiness’s greatest enemy. Properly drying chicken before breading significantly improves texture.
- Breading technique: The classic three-step process creates layers that develop different textural properties during baking.
- Temperature considerations: Starting with a preheated oven and sometimes preheated pan promotes immediate crust formation.
- Strategic fat application: While using less oil than frying, strategic oil application remains essential for crispiness development.
- Surface optimization: Increased surface area through proper pounding creates more opportunities for crunchy texture to develop.
Understanding these elements transforms disappointing results into consistently excellent outcomes.
Essential Equipment for Perfect Baked Chicken Cutlets
Your equipment choices significantly impact results:
- Wire racks positioned over baking sheets allow hot air circulation around the entire cutlet, preventing the sogginess that occurs when chicken sits directly on a pan.
- Heavy-gauge, light-colored baking sheets conduct heat evenly without excessive browning.
- Digital instant-read thermometers eliminate guesswork, ensuring cutlets reach the food-safe 165°F without overcooking.
- Meat mallets with textured surfaces create ideal thickness while also slightly roughening the surface for better breading adhesion.
Investing in these basic tools drastically improves your results without breaking your budget.
Preparing Your Chicken for Maximum Crispiness
Selecting the Right Chicken for Cutlets
Your cutlet journey begins at the market:
- Chicken breast considerations: While traditional cutlets use breast meat for its neutral flavor and tender texture, boneless skinless thighs provide more moisture forgiveness and richer flavor.
- Freshness markers: Look for meat with no discoloration or strong odors; freshness directly impacts final texture.
- Size consistency: Choose pieces of similar dimensions for even cooking across your batch.
The Essential Step: Properly Pounding Chicken Cutlets
Achieving uniform thickness remains non-negotiable for professional results:
- Position chicken between two pieces of plastic wrap or parchment to prevent splatter
- Using gentle but firm strokes, work from the center outward to maintain structural integrity
- Aim for ¼-inch thickness throughout each piece
- Avoid common errors such as pounding too aggressively, which creates tears and uneven spots
This preparation step alone eliminates 80% of problems home cooks experience with inconsistent cooking.
The Crucial Drying Process
Moisture removal stands as perhaps the single most influential factor in achieving crispiness:
- Pat chicken thoroughly with paper towels, applying firm pressure rather than merely blotting
- Apply a light sprinkling of salt 15-20 minutes before breading to draw out internal moisture
- Allow salted chicken to rest uncovered on a wire rack for additional air-drying benefits
Professional kitchens often complete this step hours ahead, but even 15 minutes makes a noticeable difference.
Classic Breading Station Setup for Baked Chicken Cutlets
The Perfect Three-Step Breading Process
Creating a proper breading station streamlines your workflow while maximizing texture development:
| Station | Ingredients | Purpose |
|---|---|---|
| Station 1 | All-purpose flour, salt, pepper | Creates a dry base layer that captures moisture and helps other ingredients adhere |
| Station 2 | Beaten eggs, Dijon mustard (optional), hot sauce (optional) | Provides the necessary moisture and binding properties for breadcrumb adhesion |
| Station 3 | Panko/breadcrumbs, herbs, grated parmesan | Delivers the crispy exterior texture that defines great cutlets |
Designate separate hands for wet and dry ingredients to prevent the frustrating “breaded fingers” phenomenon that creates lumpy coatings.
Breadcrumb Options for Various Textures
Your breadcrumb selection significantly influences final texture:
- Panko breadcrumbs deliver outstanding crispiness due to their larger, airier structure
- Traditional breadcrumbs provide more uniform coverage but slightly less crunch
- Homemade options allow complete control over seasoning and texture profiles
- Crushed cornflakes or crackers offer distinctive crunch and flavor variations
- Nut flours or crushed pork rinds create excellent gluten-free alternatives with remarkable crispiness
Experiment with combinations to find your perfect texture balance.
The Master Recipe: Basic Crispy Baked Chicken Cutlets
Ingredients List

| Ingredient | Amount | Notes |
|---|---|---|
| Chicken breasts | 1.5 pounds | Sliced horizontally or pounded thin |
| All-purpose flour | 1/2 cup | For dredging |
| Eggs | 2 large | Beaten |
| Panko breadcrumbs | 1.5 cups | For coating |
| Olive oil spray | As needed | For coating |
| Salt | 1 teaspoon | Divided between stages |
| Black pepper | 1/2 teaspoon | Fresh ground preferred |
| Garlic powder | 1/2 teaspoon | Enhances savory notes |
| Parmesan cheese | 1/4 cup | Finely grated |
| Paprika | 1/4 teaspoon | Adds color and mild flavor |
| Fresh parsley | 2 tablespoons | Finely chopped |
Step-by-Step Preparation Method
- Prepare chicken by pounding to ¼-inch thickness between parchment sheets
- Set up breading stations: flour mixture, egg wash, and seasoned breadcrumb mixture
- Using your left hand for dry ingredients and right hand for wet (or vice versa if left-handed), dredge each cutlet in flour, shaking off excess
- Dip floured cutlet into egg mixture, allowing excess to drip off
- Press firmly into breadcrumb mixture, ensuring complete coverage
- Place breaded cutlets on wire rack and allow to rest 15-20 minutes before baking (this crucial step allows coating to adhere properly)
Baking Instructions for Guaranteed Crispiness
- Preheat oven to 425°F with rack positioned in middle position
- Place wire rack on baking sheet and spray both rack and cutlets liberally with olive oil spray
- Bake for 10 minutes, then carefully flip using tongs and spray second side
- Continue baking 8-10 minutes until coating turns golden brown and internal temperature reaches 165°F
- For extra crispiness, finish with 1-2 minutes under the broiler, watching carefully to prevent burning
Resting and Serving Recommendations
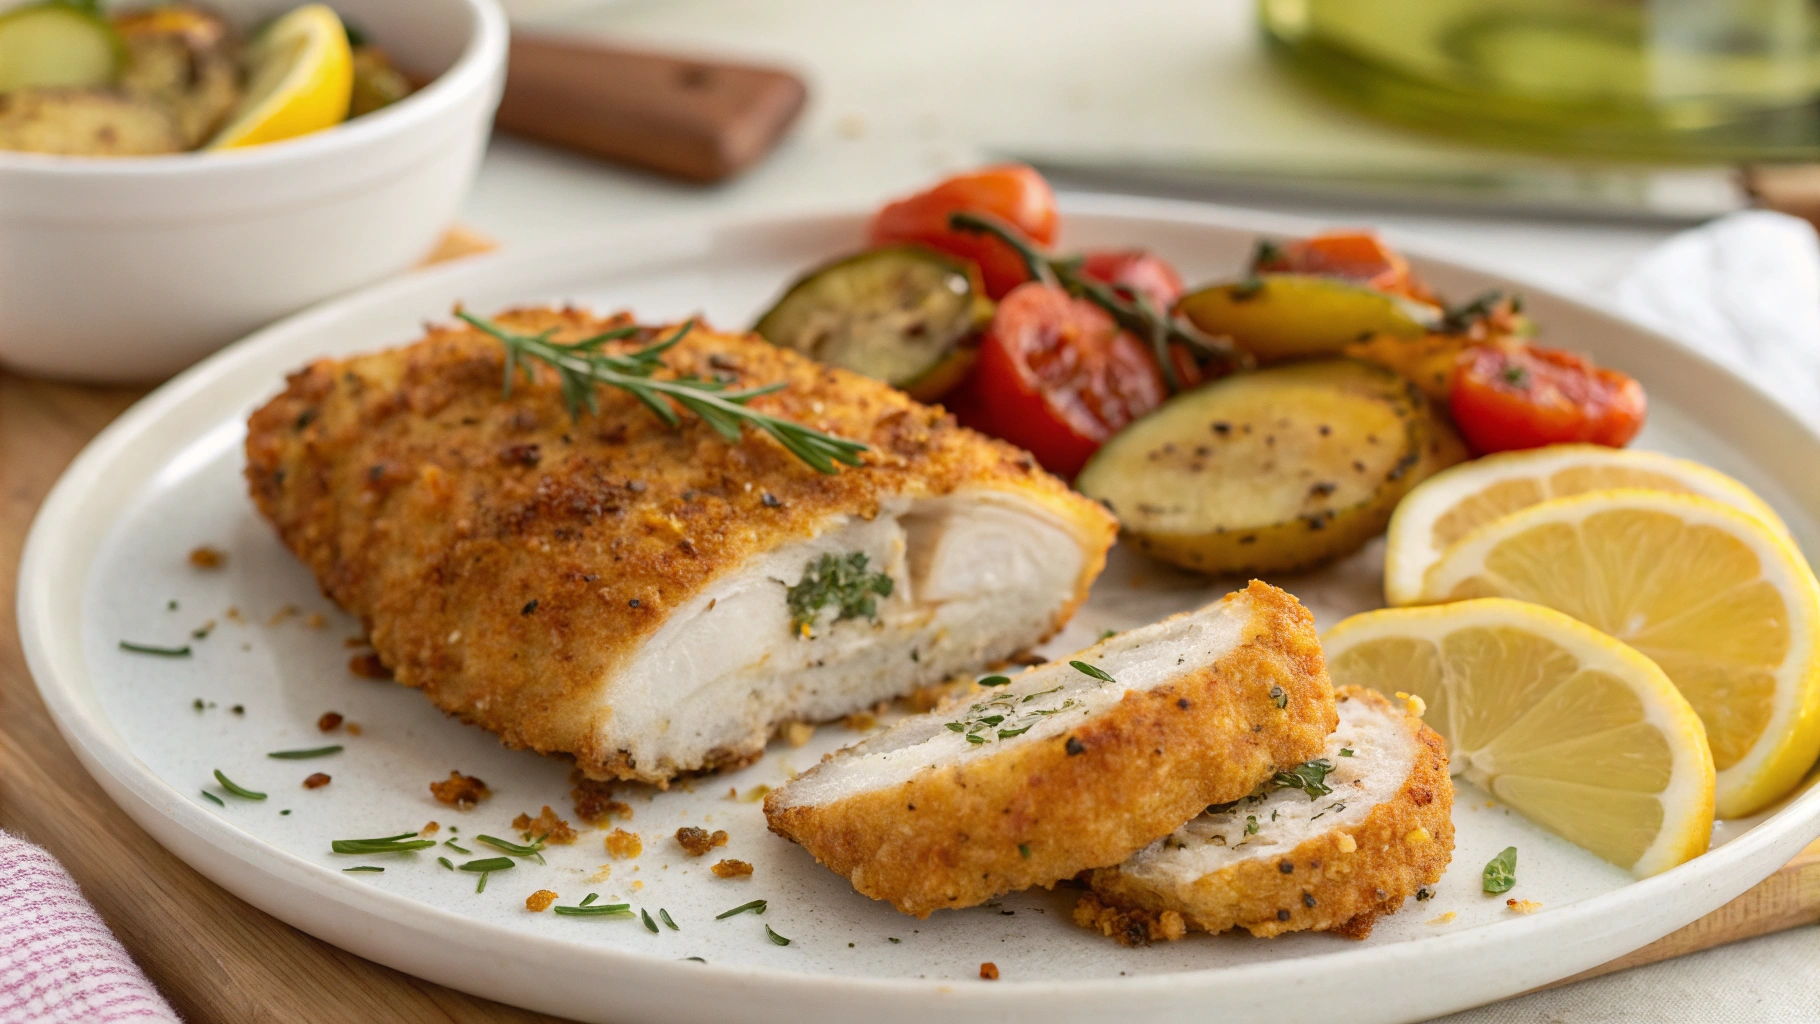
Allow cutlets to rest 3-5 minutes before slicing to retain maximum juiciness. This brief pause allows internal temperatures to equalize and juices to redistribute throughout the meat. Serve immediately while crispiness remains at its peak, garnished with additional fresh herbs and lemon wedges for brightness.
Innovative Variations on Baked Chicken Cutlets
Italian-Style Parmesan Crusted Chicken Cutlets
This Mediterranean-inspired variation elevates the basic recipe with bold Italian flavors:
| Ingredient | Amount | Notes |
|---|---|---|
| Breadcrumbs | 1 cup | Italian seasoned |
| Parmesan cheese | 1/2 cup | Freshly grated |
| Italian herbs | 1 tablespoon | Dried mix or fresh |
| Garlic | 2 cloves | Minced |
| Lemon zest | 1 teaspoon | For brightness |
Follow the master recipe preparation method, but mix these ingredients for your final breading layer. This version pairs beautifully with marinara sauce and creates an excellent foundation for chicken parmesan.
Spicy Southwest Baked Chicken Cutlets
For those who appreciate heat and bold flavors:
| Ingredient | Amount | Notes |
|---|---|---|
| Cornmeal | 1/2 cup | For extra crunch |
| Panko breadcrumbs | 1 cup | Base coating |
| Chili powder | 1 tablespoon | Adjust to taste |
| Cumin | 1 teaspoon | For earthy flavor |
| Cayenne pepper | 1/4 teaspoon | Adjust for heat preference |
This southwestern-inspired variation creates a delightful crunch with subtle heat. Serve with avocado slices, lime wedges, and cilantro for a complete flavor experience.
Herb and Lemon Crusted Chicken Cutlets
For a lighter, brighter flavor profile:
| Ingredient | Amount | Notes |
|---|---|---|
| Panko breadcrumbs | 1.5 cups | For coating |
| Fresh herbs | 1/4 cup | Mix of parsley, thyme, basil |
| Lemon zest | 2 teaspoons | From 1-2 lemons |
| Olive oil | 2 tablespoons | For moistening breadcrumbs |
| Garlic powder | 1/2 teaspoon | For flavor |
Pre-toast breadcrumbs with olive oil in a dry skillet until lightly golden before adding herbs and zest. This technique enhances both flavor and crispiness.
Troubleshooting Common Baked Chicken Cutlet Problems
Why Your Cutlets Aren’t Getting Crispy
When crispiness proves elusive, consider these potential culprits:
- Oven temperature issues: Most home ovens have temperature variations; an oven thermometer identifies this problem
- Overcrowded baking sheets: Cutlets need breathing room; crowding creates steam that destroys crispiness
- Insufficient oil application: While healthier than frying, baked cutlets still require some fat for proper crisping
- Breading inconsistencies: Skipping steps or rushing through the breading process compromises structure
Simple adjustments to these factors typically resolve crispiness issues immediately.
Fixing Dry Chicken Cutlets
Dryness, the other common complaint, has several solutions:
- Brining option: A quick 20-minute soak in saltwater solution adds remarkable moisture
- Internal temperature vigilance: Remove cutlets at exactly 165°F; every degree beyond dries the meat
- Appropriate chicken selection: Thighs naturally resist drying more effectively than breasts
- Proper resting: Skipping the resting period causes moisture loss when cutting
Make-Ahead and Storage Tips for Baked Chicken Cutlets
Freezing Unbaked Cutlets
Prepare multiple batches efficiently:
- Complete breading through all three stations
- Place breaded cutlets on parchment-lined baking sheets without touching
- Freeze until solid (approximately 2 hours)
- Transfer to freezer bags with parchment between layers
- Label with date and cooking instructions
- Store up to 3 months
When ready to cook, bake directly from frozen, adding approximately 5-7 minutes to cooking time.
Reheating Methods That Maintain Crispiness
Preserve that fresh-baked quality:
- Oven reheating: Place on wire rack in 375°F oven for 10 minutes
- Air fryer revival: 3-4 minutes at 360°F restores remarkable crispiness
- Avoid microwaving whenever possible, as it creates steam that destroys texture
Perfect Pairings for Baked Chicken Cutlets
Sauces That Complement Without Soggy Results
Strategic sauce service prevents texture compromise:
- Serve sauces separately for dipping rather than pouring over cutlets
- Consider temperature contrast with chilled sauces against hot cutlets
- Quick homemade options include lemon-garlic aioli, honey-mustard, or herb yogurt dips
Side Dish Recommendations
Complete your meal with complementary sides:
- Bright salads with acidic dressings balance the richness of cutlets
- Roasted vegetables can cook simultaneously on separate racks
- Grain options like farro or quinoa with herbs add substance without heaviness
Health Benefits of Baked vs. Fried Chicken Cutlets
Nutritional Comparison
The numbers speak volumes about why baking represents a smarter choice:
| Method | Calories (avg) | Fat (g) | Notable Benefits |
|---|---|---|---|
| Baked | 250-300 | 7-10 | Lower fat content, cleaner preparation, healthier fat profile |
| Fried | 400-500 | 20-25 | Traditional flavor, faster cooking time |
The significant calorie and fat reduction makes baked cutlets suitable for regular meal rotation rather than occasional indulgence.
Adapting Recipes for Dietary Needs
These techniques accommodate various requirements:
- Gluten-free adaptations: Substitute rice flour for the initial dredge and gluten-free panko for coating
- Lower-carb approaches: Crushed pork rinds, almond flour, or parmesan crisps create excellent low-carb crusts
- Heart-healthy modifications: Using olive oil spray and reducing salt intake supports cardiovascular health
FAQ About Baked Chicken Cutlet Recipes
Frequently Asked Questions
Q: Why aren’t my baked chicken cutlets getting as crispy as fried ones? A: Baked chicken cutlets require specific techniques to achieve maximum crispiness. Ensure you’re using sufficient oil spray, preheating your baking sheet, and utilizing the proper breadcrumb mixture as detailed in our baked chicken cutlet recipes. The wire rack method also dramatically improves crispiness by allowing air circulation underneath.
Q: Can I prepare baked chicken cutlets ahead of time? A: Absolutely! You can bread your chicken cutlets and refrigerate them for up to 24 hours before baking. For longer storage, freeze the breaded, unbaked cutlets and bake them directly from frozen, adding approximately 50% more cooking time. This makes baked chicken cutlet recipes perfect for meal prep.
Q: What’s the best way to ensure my baked chicken cutlets cook evenly? A: The most crucial step in our baked chicken cutlet recipes is pounding the chicken to an even thickness before breading. This ensures all parts of the cutlet finish cooking simultaneously, preventing dry edges or undercooked centers.
Q: Can I use chicken thighs instead of breasts for baked chicken cutlets? A: Definitely! Chicken thighs work beautifully in any baked chicken cutlet recipe, though they require slightly different cooking times and provide juicier results with richer flavor. When using thighs, aim for internal temperature rather than cooking time as your doneness indicator.
Q: How do I know when my baked chicken cutlets are done cooking? A: The safest method is using an instant-read thermometer to verify the internal temperature has reached 165°F (74°C). Visually, properly cooked baked chicken cutlets should display a golden-brown exterior and white (never pink) interior.
Conclusion: Mastering the Art of Crispy Baked Chicken Cutlets
Transforming ordinary chicken into extraordinarily crispy baked cutlets no longer requires professional training or special equipment. By understanding the fundamental principles—moisture control, proper breading technique, temperature management, and strategic fat application—you’ll consistently create healthier, delicious meals that satisfy that primal craving for crunch without the downsides of traditional frying.
Remember that mastery comes through practice. Each time you prepare these baked chicken cutlet recipes, your technique will refine further as you discover your personal preferences for seasonings and coatings. Don’t hesitate to experiment with different herb combinations, breadcrumb variations, or complementary spices to develop your signature version of this versatile dish.
The next time you’re contemplating dinner options, skip the takeout menu and instead pull out your meat mallet. With these proven techniques at your disposal, homemade crispy baked chicken cutlets will become a regular feature in your meal rotation—one that garners compliments and possibly even converts fried chicken enthusiasts to the lighter side.
Ready to elevate your chicken cutlet game? Start with the master recipe tonight, and you’ll discover firsthand why these foolproof techniques create results worth mastering.
