Table of Contents
It was a Friday night when I first discovered brookies – that magical combination of brownies and cookies that satisfies both cravings at once. My kids were begging for dessert, but I couldn’t decide between making cookies or brownies. With only 30 minutes before movie night began, I stumbled upon the solution that would forever change our family dessert traditions: the brookie. This quick and delicious dessert combines the fudgy richness of brownies with the classic comfort of chocolate chip cookies – all ready in half an hour! Today, I’m sharing my foolproof brookie recipe that’s perfect for last-minute gatherings, family nights, or whenever that unstoppable sweet tooth strikes.
What is a Brookie? Understanding the Perfect Cookie-Brownie Hybrid
The brookie represents culinary innovation at its finest – a marriage between two beloved classics that creates something entirely spectacular. While the exact origin remains somewhat disputed among baking enthusiasts, brookies gained mainstream popularity around 2013 when bakeries began featuring these hybrid treats alongside cronuts and other fusion desserts.
- Bist Amazon Picks:
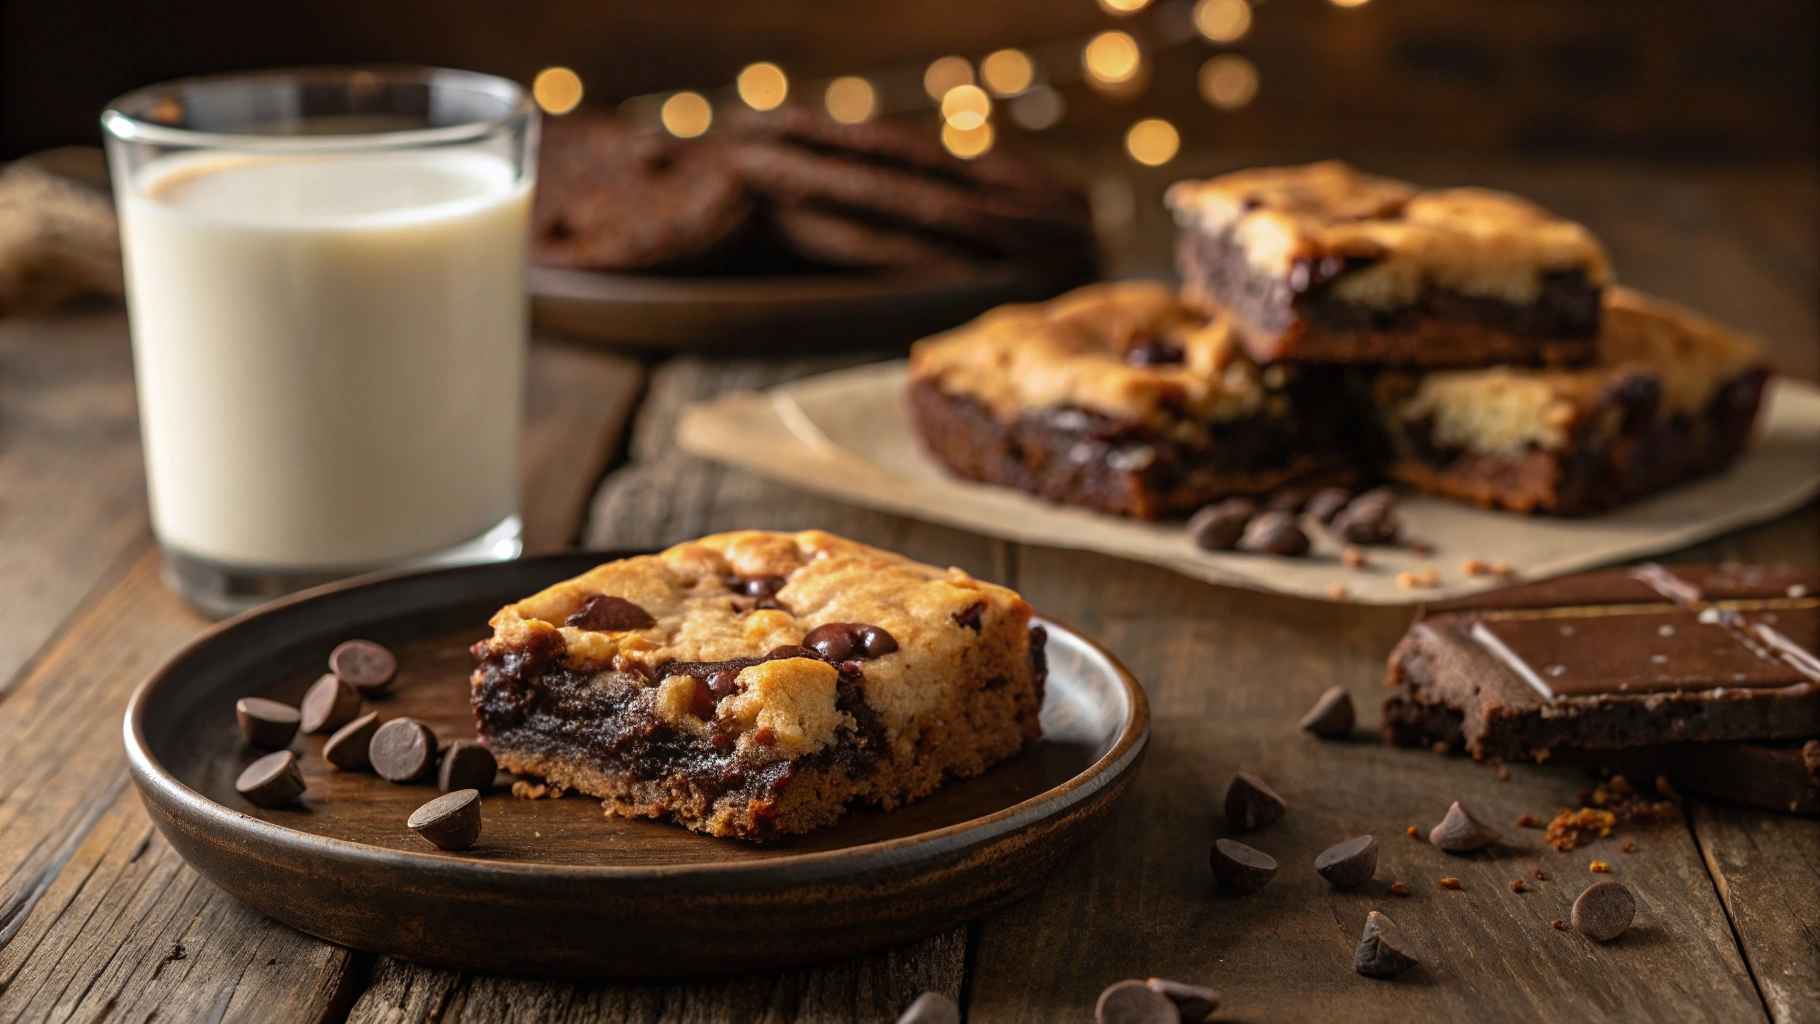
What makes brookies truly remarkable is their contrasting textures in a single bite. The foundation provides that characteristic fudgy, dense brownie experience, while the top layer delivers the familiar chewy, slightly crisp edges of a traditional chocolate chip cookie. When baked to perfection, the flavors meld together while maintaining their distinct identities.
What Makes This 30-Minute Brookie Recipe Special
Unlike many dessert recipes that require extensive preparation or specialized equipment, this brookie recipe prioritizes efficiency without sacrificing quality. You’ll appreciate how quickly everything comes together, making it ideal for those evenings when dessert cravings strike without warning.
The ingredient list features pantry staples most home bakers already have on hand. No need for last-minute grocery store trips or exotic additions – these brookies celebrate simplicity while delivering gourmet-level satisfaction.
Furthermore, this recipe welcomes customization. Whether you prefer nuts in your brownies, white chocolate in your cookies, or seasonal flavor additions, the base recipe accommodates your creative impulses beautifully.
Perhaps most importantly for novice bakers, these brookies forgive minor measurement inconsistencies. The recipe includes clear directions that lead to consistent results, boosting your confidence in the kitchen while impressing everyone lucky enough to sample your creation.
Essential Ingredients for Perfect Quick Brookies
Brownie Layer Ingredients

| Ingredient | Quantity | Notes |
|---|---|---|
| Unsalted butter | 1/2 cup (113g) | Melted |
| Granulated sugar | 1 cup (200g) | Provides sweetness and structure |
| Large eggs | 2 | Room temperature preferred |
| Vanilla extract | 1 teaspoon | Pure extract recommended |
| All-purpose flour | 3/4 cup (90g) | Measured by spooning into cup |
| Unsweetened cocoa powder | 1/4 cup (25g) | Dutch-processed for richer flavor |
| Salt | 1/4 teaspoon | Enhances chocolate flavor |
| Semi-sweet chocolate chips | 1/2 cup (90g) | Can substitute dark chocolate chips |
Cookie Layer Ingredients
| Ingredient | Quantity | Notes |
|---|---|---|
| Unsalted butter | 1/2 cup (113g) | Softened |
| Brown sugar | 1/2 cup (100g) | Light or dark both work |
| Granulated sugar | 1/4 cup (50g) | For perfect cookie texture |
| Large egg | 1 | Room temperature |
| Vanilla extract | 1 teaspoon | Enhances flavor |
| All-purpose flour | 1 1/4 cups (150g) | Measured correctly for best results |
| Baking soda | 1/2 teaspoon | For proper rise |
| Salt | 1/4 teaspoon | Balances sweetness |
| Chocolate chips | 3/4 cup (135g) | Semi-sweet traditional, but customize as desired |
The quality of ingredients genuinely matters when crafting exceptional brookies. For the most vibrant chocolate flavor in your brownie layer, consider splurging on high-quality cocoa powder. The difference between standard and premium cocoa becomes immediately apparent in the depth of flavor.
Similarly, while generic chocolate chips certainly work, selecting chips with a higher cocoa percentage elevates the entire dessert. The interplay between the sweeter cookie layer and slightly more intense chocolate creates a more sophisticated flavor profile that keeps everyone reaching for seconds.
Essential Kitchen Tools for Brookie Success
Before diving into preparation, gather these essential tools to streamline your brookie-making process:
A 9×9-inch baking pan yields thicker, more substantial brookies perfect for serious dessert enthusiasts. If you prefer a thinner profile or need to serve more people, a 9×13-inch pan works beautifully.
Parchment paper proves indispensable here. Creating a sling with overlapping edges extending beyond the pan provides handles for easy removal once baked. This simple step prevents broken brookies and frustrated attempts to extract them from the pan.
Two mixing bowls keep your processes organized – one for the brownie foundation and another for the cookie topping. While not strictly necessary, having separate dedicated bowls prevents cross-contamination between the distinct layers.
Standard measuring cups and spoons ensure accurate proportions. Remember that baking success often depends on precision, particularly regarding flour measurements.
A sturdy rubber spatula helps incorporate ingredients thoroughly while scraping down bowl sides for consistent mixtures. It also assists in spreading batters evenly in your prepared pan.
While entirely optional, a stand mixer or hand mixer significantly reduces effort when preparing the cookie layer. The creaming process for butter and sugars benefits from mechanical assistance, though determined bakers can accomplish everything by hand.
Step-by-Step 30-Minute Brookie Recipe Instructions
Preparation Steps (5 Minutes)
- Preheat your oven to 350°F (175°C). Proper temperature proves essential for achieving that perfect balance between fully-baked edges and slightly gooey centers.
- Cut parchment paper to fit your baking pan, allowing several inches of overhang on at least two opposing sides. This overhang creates handles for lifting the finished brookies from the pan.
- Gather and measure all ingredients for both layers before beginning. This mise en place approach prevents mid-recipe scrambling and helps maintain the quick 30-minute timeline.
- Allow refrigerated ingredients (eggs, butter) to reach room temperature. Room-temperature eggs incorporate more effectively, while properly softened butter (for the cookie layer) creams more successfully with sugars.
Brownie Layer Instructions (10 Minutes)
- Place unsalted butter in a microwave-safe bowl and heat until completely melted, typically 30-45 seconds. Allow to cool slightly before proceeding.
- Add granulated sugar to the melted butter, whisking vigorously until well combined. The mixture should appear somewhat grainy but uniform.
- Incorporate eggs one at a time, whisking thoroughly after each addition. Add vanilla extract and blend until the mixture appears glossy and slightly thickened.
- In a separate small bowl, whisk together flour, cocoa powder, and salt. Add these dry ingredients to your wet mixture, gently folding until just combined. Avoid overmixing, which can make brownies tough rather than tender.
- Fold in chocolate chips, distributing them evenly throughout the batter.
- Transfer brownie batter to your prepared pan, spreading into an even layer that reaches all corners. Use your spatula to smooth the surface for an even foundation.
Cookie Layer Instructions (10 Minutes)
- In a clean bowl, combine softened butter with both brown and granulated sugars. Mix until light and fluffy – this typically takes 2-3 minutes with an electric mixer or 4-5 minutes by hand. This creaming process incorporates air, creating those characteristic cookie textures.
- Add egg and vanilla extract to your butter-sugar mixture, beating until fully incorporated and slightly fluffy.
- In a separate bowl, whisk together flour, baking soda, and salt. Add these dry ingredients to your wet mixture, stirring gently until just combined. The cookie dough should come together without visible flour pockets but avoid overmixing.
- Fold in chocolate chips until evenly distributed throughout the dough.
- Drop spoonfuls of cookie dough across the surface of your brownie layer. Don’t worry about creating perfect coverage – small gaps actually create an appealing finished appearance.
- Using slightly dampened fingertips or the back of a spoon, gently press cookie dough portions down to create a somewhat even layer. The cookie dough won’t completely cover the brownie layer, and that’s perfectly fine – the dough spreads during baking.
Baking and Cooling (15 Minutes Baking + Cooling Time)
- Place your pan on the middle rack of your preheated oven and bake for 20-25 minutes. The brookies are ready when the cookie layer appears golden around the edges while the center remains slightly underdone.
- Test doneness by inserting a toothpick into the center – it should emerge with a few moist crumbs rather than wet batter. Remember that brookies continue cooking slightly from residual heat after removal from the oven.
- Allow your creation to cool in the pan for at least 15 minutes. This cooling period stabilizes the structure, making them easier to cut cleanly.
- Use the parchment paper handles to carefully lift the entire brookie slab from the pan, transferring to a cooling rack.
- For cleanest slices, allow brookies to cool completely before cutting. However, serving them while still slightly warm creates an irresistible melty texture perfect for extreme dessert enthusiasts.
Customizing Your 30-Minute Brookie Recipe
One of the greatest advantages of this brookie recipe lies in its adaptability. Consider these creative variations for both layers:
Mix-in ideas for the brownie layer:
- Chopped walnuts or pecans add delightful texture contrast
- Mint chips create a refreshing chocolate-mint combination
- Caramel bits melt during baking, creating pockets of gooey goodness
- White chocolate chips provide sweet contrast against the dark chocolate base
- Peanut butter chips introduce that classic chocolate-peanut butter partnership
Mix-in ideas for the cookie layer:
- Colorful M&Ms add visual appeal perfect for children’s parties
- Crushed Oreos create a meta cookie-within-a-cookie experience
- Butterscotch chips contribute rich caramel notes
- Toffee bits introduce buttery crunch and caramelized flavors
- Festive sprinkles transform brookies into celebration-worthy treats
Seasonal Brookie Variations
Transform this versatile recipe throughout the year with these season-specific adaptations:
During autumn months, incorporate pumpkin spice into your cookie layer while maintaining the chocolate brownie foundation. Add ¼ teaspoon each of cinnamon, nutmeg, and allspice to your cookie dough for an autumn-inspired variation.
Winter celebrations call for peppermint-infused brownies paired with traditional chocolate chip cookie topping. Simply add ¼ teaspoon peppermint extract and crushed candy canes to your brownie batter.
When spring arrives, consider brightening your dessert with a lemon-infused cookie layer atop a white chocolate brownie base. Add 1 tablespoon lemon zest and replace semi-sweet chips with white chocolate in both layers.
Summer gatherings benefit from s’mores-inspired brookies. Mix graham cracker crumbs into your cookie dough and dot marshmallows across the top during the last five minutes of baking for that campfire dessert experience.
Troubleshooting Common Brookie Recipe Problems
Even experienced bakers occasionally encounter challenges. Here’s how to address common brookie issues:
Issue: Too dry brookies Solution: Reduce baking time by 2-3 minutes; make sure not to overmix batters. Overmixing incorporates excess air and develops gluten, resulting in tougher, drier final products. Additionally, slightly underbaking brookies ensures that desirable fudgy texture.
Issue: Layers don’t hold together Solution: Press cookie dough more firmly onto brownie layer before baking. The two layers should meld during baking, but inadequate pressure can result in separation later. Also ensure your brownie layer hasn’t begun setting before adding the cookie dough.
Issue: Cookie layer browns too quickly Solution: Tent with aluminum foil halfway through baking. This simple technique shields the top from direct heat while allowing the interior to continue cooking properly. Position the foil loosely to avoid disturbing the still-soft cookie layer.
Issue: Brookies too gooey in center Solution: Increase baking time by 3-5 minutes or use a slightly larger pan. Remember that proper cooling also contributes significantly to final texture – some patience yields better results than extended baking times.
Storing and Serving Your Quick Brookie Dessert
Storage Options
Room temperature storage works beautifully for brookies you’ll consume within three days. Simply place them in an airtight container with layers separated by parchment paper to prevent sticking.
For longer preservation, refrigeration extends freshness up to one week. The cooler temperature firms the texture slightly, creating a denser, fudgier experience many find irresistible.
Freezing opens possibilities for advance preparation. Wrap individual portions or entire uncut slabs tightly in plastic wrap, then aluminum foil, before freezing for up to three months.
Reheating Tips
Microwave individual brookie portions for 10-15 seconds to restore that fresh-baked warmth and slightly melted chocolate chips. This quick treatment transforms refrigerated or room-temperature brookies back to their just-baked glory.
For frozen brookies, thaw overnight in your refrigerator before enjoying at room temperature or briefly heating as described above.
Serving Suggestions
Elevate your brookie experience with these serving enhancements:
A warm brookie topped with vanilla ice cream creates temperature and texture contrasts that amplify the dessert experience exponentially. The melting ice cream mingles with warm chocolate for pure dessert perfection.
A light dusting of powdered sugar adds visual appeal and subtle sweetness that complements both layers beautifully.
Drizzling with chocolate sauce or caramel creates dramatic presentation while introducing additional flavor dimensions to an already impressive dessert.
For the ultimate indulgence, slice cooled brookies horizontally and add ice cream between layers to create extraordinary ice cream sandwiches that will become legendary at summer gatherings.
Crumbled brookies make exceptional toppings for pudding or yogurt parfaits, adding texture and intense flavor to simpler desserts.
Why This 30-Minute Brookie Recipe Will Become Your Go-To Dessert
The remarkable efficiency of this recipe transforms it from occasional treat to regular rotation in your baking repertoire. When unexpected visitors announce their arrival, you’ll appreciate having this quick solution available.
Unlike specialized desserts that appeal to limited audiences, brookies consistently please diverse palates. Children gravitate toward their familiar flavors and fun presentation, while adults appreciate their nostalgic elements combined with sophisticated execution.
The dual-dessert nature of brookies makes them inherently more impressive than standard cookies or brownies alone. This perception of extra effort (despite the actual simplicity) elevates your baking reputation tremendously.
The endless customization possibilities prevent flavor fatigue. By varying mix-ins, you’ll create dozens of unique variations from this single foundational recipe.
Perhaps most practically, brookies function beautifully as make-ahead desserts. When facing busy weeks, prepare a batch during weekend downtime for ready-to-serve treats throughout hectic days ahead.
Frequently Asked Questions About Brookie Recipes
Can I make this brookie recipe ahead of time?
Yes! This quick brookie recipe actually tastes even better the next day as the flavors meld. Make them up to 2 days in advance and store in an airtight container. For optimal freshness when serving later, slightly underbake them initially, as they’ll continue firming up during storage.
Can I double this 30-minute brookie recipe?
Absolutely! Double all ingredients and use a larger pan (13×18-inch) or two 9×9-inch pans for a perfect double batch of brookies. When doubling, maintain the same baking temperature but check for doneness a few minutes earlier than doubled time, as larger pans sometimes distribute heat differently.
Why are my brookies too cakey instead of fudgy?
The secret to fudgy brookies is slightly underbaking them. Remove from the oven when the center still looks slightly underdone but the edges are set. Additionally, check your measuring technique – too much flour often causes cakier textures. For accurate measurement, spoon flour into measuring cups rather than scooping directly from containers.
Can I make this brookie recipe gluten-free?
Yes! Simply substitute the all-purpose flour with a 1-to-1 gluten-free baking flour blend in both the brownie and cookie layers. Look for blends containing xanthan gum for proper structure. Many bakers report excellent results using brands specifically formulated for baking applications rather than general-purpose gluten-free flours.
What makes this brookie recipe so quick compared to others?
This streamlined brookie recipe uses simple ingredients, efficient mixing methods, and optimized baking time to deliver delicious results in just 30 minutes from start to finish! Unlike recipes requiring chilling time or separate pre-baking of layers, this version uses temperature and texture science to create perfect layering without additional steps.
Conclusion
The beauty of this 30-minute brookie recipe lies in its simplicity and versatility. Whether you’re a seasoned baker or just starting out, these cookie-brownie hybrids deliver impressive results with minimal effort. The contrast between the fudgy brownie base and chewy chocolate chip cookie top creates a dessert experience that satisfies multiple cravings at once.
Next time you’re short on time but still want to impress with a homemade dessert, remember that these quick brookies are just 30 minutes away! The straightforward preparation process makes them accessible even on your busiest days, while the spectacular results belie their simplicity.
We’d love to see your brookie creations! Share photos of your finished brookies on social media using #30MinuteBrookies or comment below with your favorite customization ideas. Did you try a seasonal variation? Discover a new mix-in combination? Your creative twists might inspire fellow bakers to expand their brookie horizons too!
Ready to tackle more quick dessert solutions? Subscribe to our newsletter for weekly recipes that maximize flavor while minimizing kitchen time. Until then, happy baking – your perfect brookies await!
