Table of Contents
There’s something deeply satisfying about transforming a tough cut of meat into something so tender it melts in your mouth. Beef cheeks represent that beautiful culinary journey—from overlooked and underappreciated to a dish that rivals the finest restaurant offerings. The first time I slow-cooked beef cheeks, watching them transform from tough muscle to buttery tenderness, I realized this wasn’t just cooking—it was magic. Today, I’m sharing that magic with you through this comprehensive guide to preparing beef cheeks that will impress even the most discerning dinner guests.
What Are Beef Cheeks and Why They’re Worth Cooking
Beef cheeks, as the name suggests, are the facial cheek muscles of cattle. These hardworking muscles support constant chewing throughout the animal’s life, resulting in a uniquely textured cut that’s packed with connective tissue. Don’t let that description deter you—this connective tissue is precisely what makes beef cheeks extraordinary when cooked properly.
Unlike tenderloin or ribeye that rely on marbling for flavor, beef cheeks derive their remarkable richness from collagen. When subjected to low, slow cooking methods, this collagen transforms into gelatin, creating that distinctive melt-in-your-mouth quality that makes beef cheeks truly exceptional.
- Bist Amazon Picks:
Top restaurants have embraced beef cheeks for their depth of flavor and velvety texture when braised. Perhaps the best news for home cooks is that this gourmet-worthy cut remains relatively affordable compared to premium steaks. You’re essentially getting restaurant-quality results at a fraction of the price—both at the butcher counter and compared to dining out.
Selecting the Perfect Beef Cheeks
Finding quality beef cheeks begins with knowing what to look for. When examining beef cheeks at your butcher or specialty market, seek pieces that display a deep, rich red color—a sign of freshness and proper handling. Each cheek typically weighs between 11-14 ounces (300-400g), though this varies depending on the animal.
Look for pieces that have been properly trimmed of excessive fat but still maintain a thin layer for flavor development during cooking. The surface should be clean, firm, and slightly moist but never slimy. Premium beef cheeks will have minimal silver skin (the tough membranous tissue), though you’ll likely need to remove some during preparation.
When deciding between grass-fed and grain-fed beef cheeks, consider that grass-fed typically offers more pronounced flavor complexity but might require slightly longer cooking. Grain-fed cheeks often present more marbling and a milder flavor profile. For serving size calculations, plan for one beef cheek per hungry adult or two lighter appetites.
Don’t be discouraged if your regular supermarket doesn’t stock beef cheeks—they’re often available by request from butchers who receive whole animals, or can be found at specialty markets and online meat purveyors that focus on whole-animal butchery.
Essential Preparation Steps for Beef Cheeks
Trimming and Cleaning
Proper preparation lays the foundation for exceptional beef cheeks. Start by rinsing the cheeks under cold water and patting them dry with paper towels. Using a sharp boning or paring knife, carefully remove any tough silver skin or excess fat caps while leaving the thin intramuscular fat that will render during cooking.
Work with the grain of the muscle, allowing your knife to slide between the silver skin and the meat in long, smooth strokes. Take your time with this step—proper trimming ensures even cooking and prevents chewy sections in your final dish.
The cleaned beef cheeks should have a uniform appearance with minimal white connective tissue visible on the surface. This precision in preparation differentiates mediocre beef cheeks from truly exceptional ones.
The Crucial Marinade
While not strictly necessary, marinating beef cheeks amplifies their natural flavors and begins the tenderizing process. Even a brief 2-hour marinade makes a noticeable difference, though overnight provides optimal results.
A foundational beef cheek marinade combines:
- Acidic elements (wine, vinegar, or citrus juice) to begin breaking down tough fibers
- Aromatic vegetables (onions, carrots, celery) for flavor complexity
- Herbs (thyme, rosemary, bay leaves) for aromatic depth
- Salt to enhance flavor penetration
The marinade doesn’t need to fully submerge the meat—rather, turn the cheeks occasionally to ensure even flavor distribution. Remember to reserve your marinade if your recipe calls for using it in the cooking liquid.
Cooking Methods for Perfect Beef Cheeks
Traditional Braising Method
Braising remains the gold standard for transforming beef,cheeks into their most glorious form. This two-part cooking method begins with searing to develop flavor, followed by gentle simmering in liquid.
Begin by removing the beef cheeks from any marinade and patting them thoroughly dry—moisture is the enemy of proper browning. Heat a heavy-bottomed Dutch oven over medium-high heat with a tablespoon of high smoke-point oil like avocado or grape seed until shimmering.
Carefully place the beef,cheeks in the hot oil, working in batches if necessary to prevent crowding. Sear each side for 2-3 minutes until a deep mahogany crust forms. This Maillard reaction creates compounds that contribute significantly to the final flavor profile.
Once seared, transfer the cheeks to a plate and reduce the heat to medium. Add your aromatic vegetables to the same pot, stirring to release the fond (browned bits) from the bottom—this is pure flavor you don’t want to waste. After the vegetables have softened slightly (about 5 minutes), deglaze with wine or stock, scraping the bottom thoroughly.
Return the beef,cheeks to the pot along with enough liquid (stock, wine, or a combination) to cover them halfway. The liquid should never fully submerge the meat. Add aromatics like bay leaves, peppercorns, and herbs, then bring to a gentle simmer.
Cover the pot and transfer to a preheated 300°F (150°C) oven. The beef,cheeks will need approximately 3-4 hours, depending on size and desired tenderness. They’re ready when a fork slides in effortlessly and twists with almost no resistance.
Pressure Cooker/Instant Pot Method
For those pressed for time, pressure cooking offers remarkable results in a fraction of the time. Follow the same searing process described above, using your pressure cooker’s sauté function.
After deglazing and returning the beef cheeks to the pot, add liquid to cover about one-third of the meat’s height—pressure cooking requires less liquid than traditional braising. Lock the lid and cook on high pressure for 50 minutes, followed by a 15-minute natural pressure release.
The pressure cooking environment raises the boiling point of water, allowing collagen to break down more rapidly without drying out the meat. The result closely approximates traditional braising with significantly less time investment.
Sous Vide Technique
Sous vide cooking provides unparalleled precision for beef,cheeks. After trimming, season generously and seal the cheeks in vacuum bags with aromatics like garlic, thyme sprigs, and a splash of wine.
Cook at 176°F (80°C) for 24-30 hours. This extended time at precise temperature breaks down collagen while maintaining perfect moisture levels. After cooking, quickly sear the beef,cheeks in a hot skillet to develop crust, then use the bag juices as the foundation for your sauce.
While time-intensive, sous vide beef,cheeks offer a unique texture that combines extreme tenderness with better retention of the meat’s structure compared to other methods.
Classic Beef Cheek Recipe: Red Wine Braised Beef Cheeks
Ingredients Table

| Ingredient | Quantity | Notes |
|---|---|---|
| Beef cheeks | 4 pieces (about 3 lbs/1.4 kg) | Trimmed of excess fat and silver skin |
| Olive oil | 2 tablespoons | For searing |
| Yellow onions | 2 medium | Roughly chopped |
| Carrots | 2 large | Roughly chopped |
| Celery stalks | 2 | Roughly chopped |
| Garlic cloves | 6 | Lightly crushed |
| Tomato paste | 2 tablespoons | Adds depth and umami |
| Dry red wine | 2 cups | Cabernet Sauvignon or Malbec work well |
| Beef stock | 2 cups | Low-sodium preferred |
| Bay leaves | 3 | Fresh or dried |
| Fresh thyme sprigs | 4 | Tied together for easy removal |
| Black peppercorns | 1 teaspoon | Whole |
| Sea salt | To taste | Diamond Crystal kosher recommended |
| Fresh parsley | ¼ cup | Finely chopped, for garnish |
Step-by-Step Cooking Instructions
- Preheat your oven to 300°F (150°C).
- Season the trimmed beef,cheeks generously with salt and pepper on all sides.
- Heat olive oil in a large Dutch oven over medium-high heat until shimmering.
- Working in batches to avoid crowding, sear the beef,cheeks for 2-3 minutes per side until deeply browned. Transfer to a plate.
- Reduce heat to medium and add onions, carrots, and celery to the same pot. Cook for 5-7 minutes until vegetables begin to soften.
- Add garlic and cook for another minute until fragrant.
- Stir in tomato paste and cook for 2 minutes, allowing it to darken slightly.
- Pour in red wine, scraping the bottom of the pot to release any browned bits. Allow wine to simmer and reduce by about half, approximately 5 minutes.
- Return beef,cheeks to the pot and add beef stock, bay leaves, thyme, and peppercorns.
- Bring the liquid to a gentle simmer, cover with a tight-fitting lid, and transfer to the preheated oven.
- Braise for 3-4 hours, checking occasionally, until beef,cheeks are fork-tender.
- Once tender, carefully remove beef,cheeks to a serving platter and cover loosely with foil.
- Strain the cooking liquid through a fine-mesh sieve, pressing on solids to extract maximum flavor.
- Return strained liquid to the pot and simmer over medium heat until reduced to your desired sauce consistency, typically 10-15 minutes.
- Adjust seasoning with salt and pepper as needed.
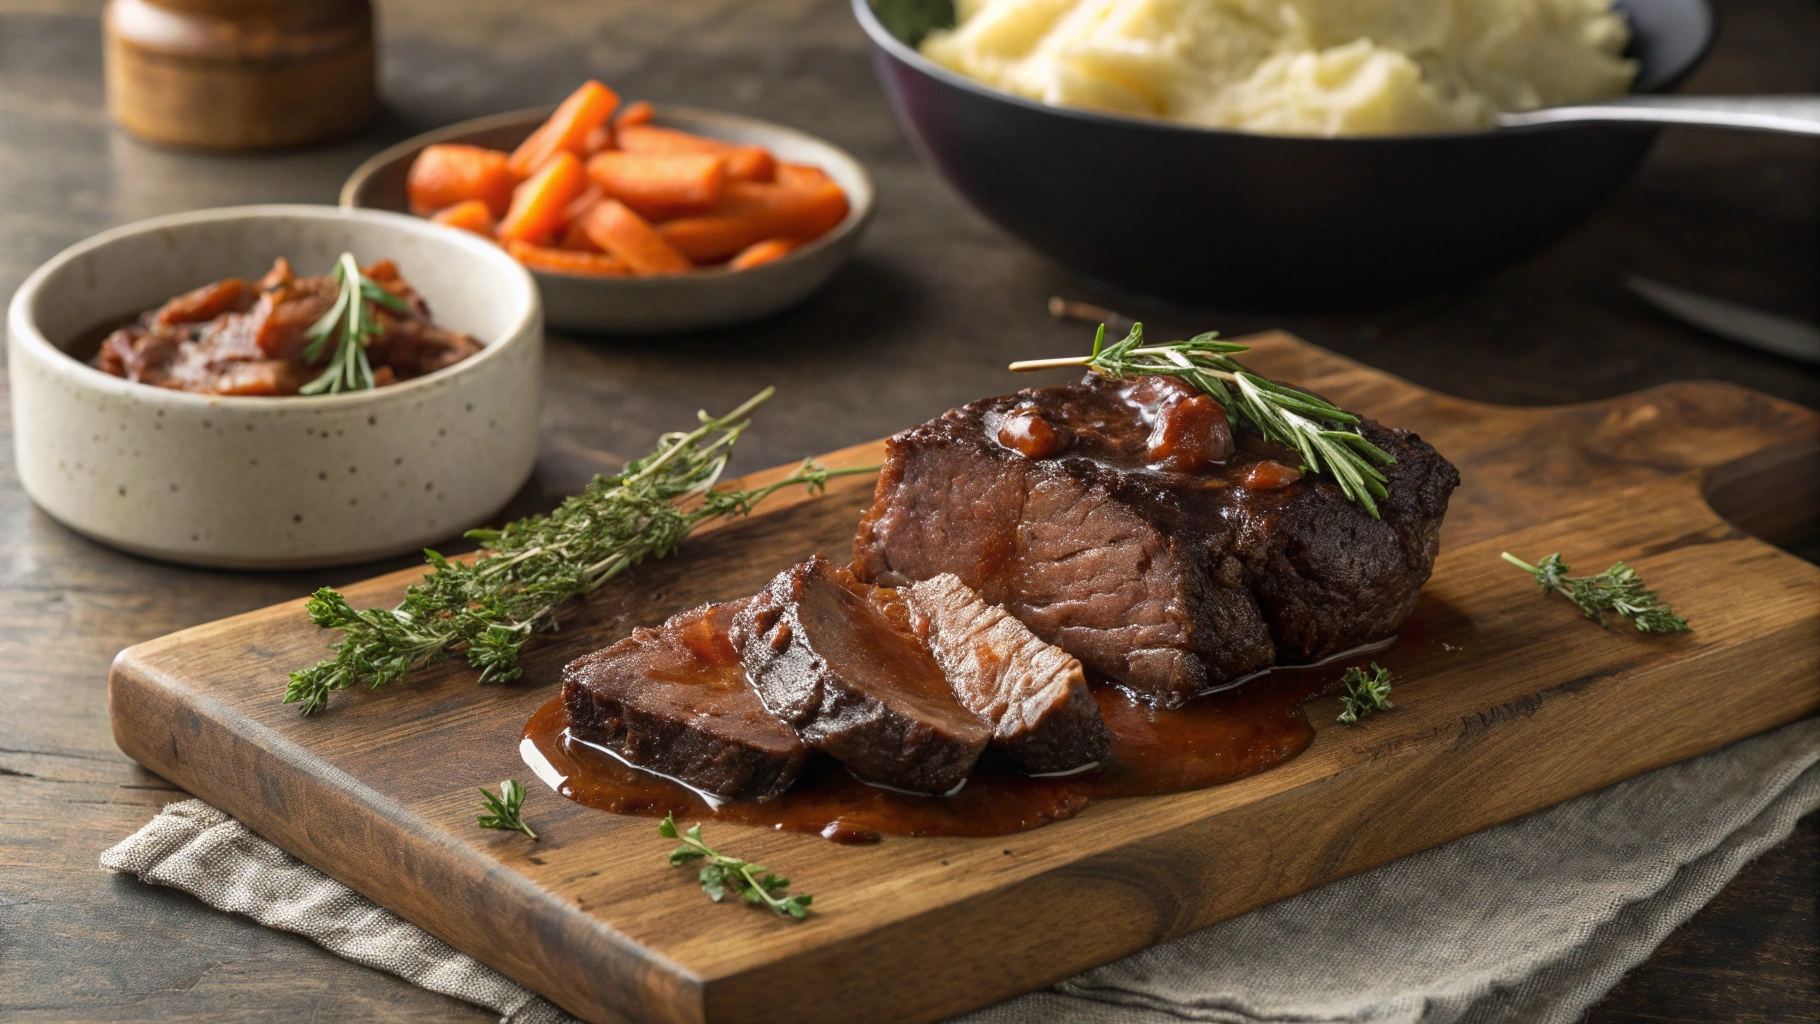
- Pour sauce over beef cheeks, garnish with fresh parsley, and serve.
The visual cue for perfectly cooked beef,cheeks is when they maintain their shape but yield completely when pressed with a fork. If you encounter resistance, they need more time—the difference between “almost done” and “perfect” can be as much as 30 minutes.
Flavor Variations and International Inspirations
Mexican-Style Beef Cheek Tacos
Transform your beef,cheeks into spectacular taco filling by adjusting your braising liquid to include dried chilies (guajillo and ancho), Mexican oregano, cumin, cinnamon, and orange juice. After cooking, shred the tender meat and serve in warm corn tortillas topped with diced white onion, cilantro, and a squeeze of lime.
Quick-pickled red onions make an ideal accompaniment—simply combine thinly sliced red onion with lime juice, a pinch of salt, and a teaspoon of honey. Allow to sit for 30 minutes before serving alongside your tacos.
Italian Beef Cheek Ragu
For an Italian interpretation, braise your beef,cheeks with red wine, crushed tomatoes, rosemary, sage, and a parmesan rind. Once tender, shred the meat and combine with the reduced sauce for a luxurious ragu that pairs perfectly with wide pasta shapes like pappardelle or tagliatelle.
This version benefits from making a day ahead, allowing flavors to meld overnight in the refrigerator. Reheat gently before serving, topped with freshly grated Parmigiano-Reggiano and chopped Italian parsley.
Asian-Inspired Beef Cheeks
Create an aromatic masterpiece by braising beef,cheeks in a mixture of soy sauce, Chinese Shaoxing wine, star anise, cinnamon sticks, ginger slices, and brown sugar. The resulting glossy, umami-rich sauce pairs beautifully with steamed rice and blanched greens like bok choy or gai lan.
Garnish with sliced scallions, sesame seeds, and perhaps a scatter of crispy fried shallots for textural contrast.
Perfect Side Dishes to Serve with Beef Cheeks
The rich, velvety texture of beef,cheeks pairs wonderfully with sides that can soak up their luxurious sauce. Consider creamy polenta enriched with butter and parmesan, or silky mashed potatoes with a touch of roasted garlic.
For vegetable accompaniments, focus on options that provide contrast—both in texture and flavor. Roasted root vegetables offer sweet caramelized notes, while braised bitter greens like escarole or kale cut through richness with their slight astringency.
Wine pairing hinges on matching the intensity of your beef,cheek preparation. For classic red wine braised versions, choose full-bodied reds with good acidity like Barolo, Syrah, or mature Bordeaux blends. These wines stand up to the dish’s richness while their acidity refreshes the palate between bites.
Storing and Reheating Leftover Beef Cheeks
Beef,cheeks actually improve with time as flavors continue to develop, making them ideal for preparing ahead. To store properly, cool completely before refrigerating in an airtight container with some of their cooking liquid to prevent drying. They’ll keep beautifully for up to 4 days refrigerated or 3 months when frozen.
For reheating, gentle heat is crucial to maintain their perfect texture. Place the beef,cheeks with some sauce in a covered ovenproof dish and warm in a 325°F (165°C) oven until heated through, about 20-25 minutes. Alternatively, reheat slowly on the stovetop in a covered pan with a splash of stock to maintain moisture.
Leftover beef,cheeks can be repurposed into magnificent sandwiches on crusty bread with caramelized onions, incorporated into rich meat pies, or shredded into decadent pasta sauce.
Frequently Asked Questions About Cooking Beef Cheeks
Why are my beef cheeks still tough after cooking?
The most common reason for tough beef,cheeks is simply insufficient cooking time. Unlike many cuts where doneness is a matter of preference, beef cheeks require complete breakdown of their connective tissue. If your beef cheeks resist when tested with a fork, continue cooking. Each piece has its own timeline based on the animal’s age and muscle development.
Temperature consistency also matters—if your braising liquid dipped below a simmer or your oven temperature fluctuated, the collagen-to-gelatin conversion may have stalled. Return to a gentle simmer and continue cooking until properly tender.
Can beef cheeks be cooked in a slow cooker?
Absolutely! Slow cookers excel at the low, consistent heat perfect for beef cheeks. Follow the same preparation steps—trimming, seasoning, and searing—before transferring to your slow cooker with aromatics and liquid. Cook on low for 8-10 hours or high for 5-6 hours until fork-tender.
The primary adaptation for slow cookers is reducing the liquid amount, as they generate minimal evaporation. Use about half the liquid called for in traditional braising recipes, and consider leaving the lid slightly ajar for the final hour if the sauce needs thickening.
Where can I find beef cheeks if my regular grocery store doesn’t carry them?
Specialty butcher shops remain your best option for sourcing quality beef cheeks. Call ahead to ensure availability or place a special order. Many ethnic markets, particularly those serving Hispanic or Asian communities, regularly stock beef cheeks (sometimes labeled “cachete” or “cabeza” in Hispanic markets).
Online meat purveyors focusing on sustainable, whole-animal butchery also offer beef cheeks, often from heritage breeds with superior flavor. If beef cheeks remain elusive, beef short ribs or oxtail make reasonable substitutes, offering similar collagen content and cooking properties.
How do I know when beef cheeks are perfectly cooked?
The definitive test comes down to texture. Insert a fork into the thickest part of the beef cheek—it should slide in with minimal resistance and twist easily. The meat should yield completely but still maintain its structural integrity rather than falling apart.
Visually, perfectly cooked beef cheeks will have shrunk somewhat from their raw state and display a glistening exterior from rendered collagen. The cooking liquid will have a lip-sticking quality due to dissolved gelatin.
Can I prepare beef cheeks ahead of time for a dinner party?
Beef cheeks are ideal for advance preparation, often tasting even better the following day as flavors meld and develop complexity. Cook them completely, then cool and refrigerate in their cooking liquid for up to two days before your event.
To serve, gently reheat in a 325°F (165°C) oven, covered, until warmed through (about 25-30 minutes). The sauce may thicken considerably when chilled due to gelatin content—thin with a small amount of stock if necessary while reheating.
Conclusion
Beef cheeks represent the beautiful intersection of traditional cooking wisdom and modern culinary appreciation. By following this guide, you’ll master the art of transforming this humble beef cut into a dish worthy of celebration. The journey from tough to tender isn’t just about patience—it’s about understanding the unique qualities of beef cheeks and honoring them with proper technique.
What makes cooking beef cheeks so rewarding isn’t just their remarkable flavor and texture, but the way they exemplify cooking’s transformative power. There’s profound satisfaction in creating something extraordinary from an overlooked ingredient—a reminder that with time, technique, and understanding, we can discover culinary treasures in unexpected places.
Now that you’re equipped with comprehensive knowledge about selecting, preparing, and cooking beef cheeks, it’s time to experience their magic firsthand. Whether you choose the traditional braising method or experiment with international flavor profiles, you’re on your way to creating a memorable dish that will impress family and friends alike.
Share your beef cheek cooking adventures in the comments below, including any creative variations you’ve discovered. We’d love to hear how this guide helped transform your understanding and appreciation of this remarkable cut of beef!
